
If you are here from Deborah's blog then you're in the right place. If you just came upon this hop by chance today, start back at Deb's because you're not going to want to miss a thing!! (she also has some fab candy!!)
For my project I made a garden pot sculpture, I'm sure some of you have seen this. You know those painted pots that stack on top of each other and seem to defy gravity. Even my husband had doubts I could pull it off, has he not learned the power of a woman determined????? Honestly, it wasn't hard at all, I even enlisted his help to finish pounding the rod into the ground for me :) Here it is step by step:
 |
| First "we" pounded the rod into the ground. I chose this spot to hide the line where the 2 bamboo screens meet. The screens help hide my neighbors unsightly yard since we spend so much time out here in the summer. |
 |
| Next, I slid the first pot down, filled with soil and plants. |

 |
| Then I worked pot by pot, sliding down, leaning to the side the the other side, adding soil and plants. |

 |
| We probably could have pounded that rod down a bit more but I planned for this when I picked out my plants.... |
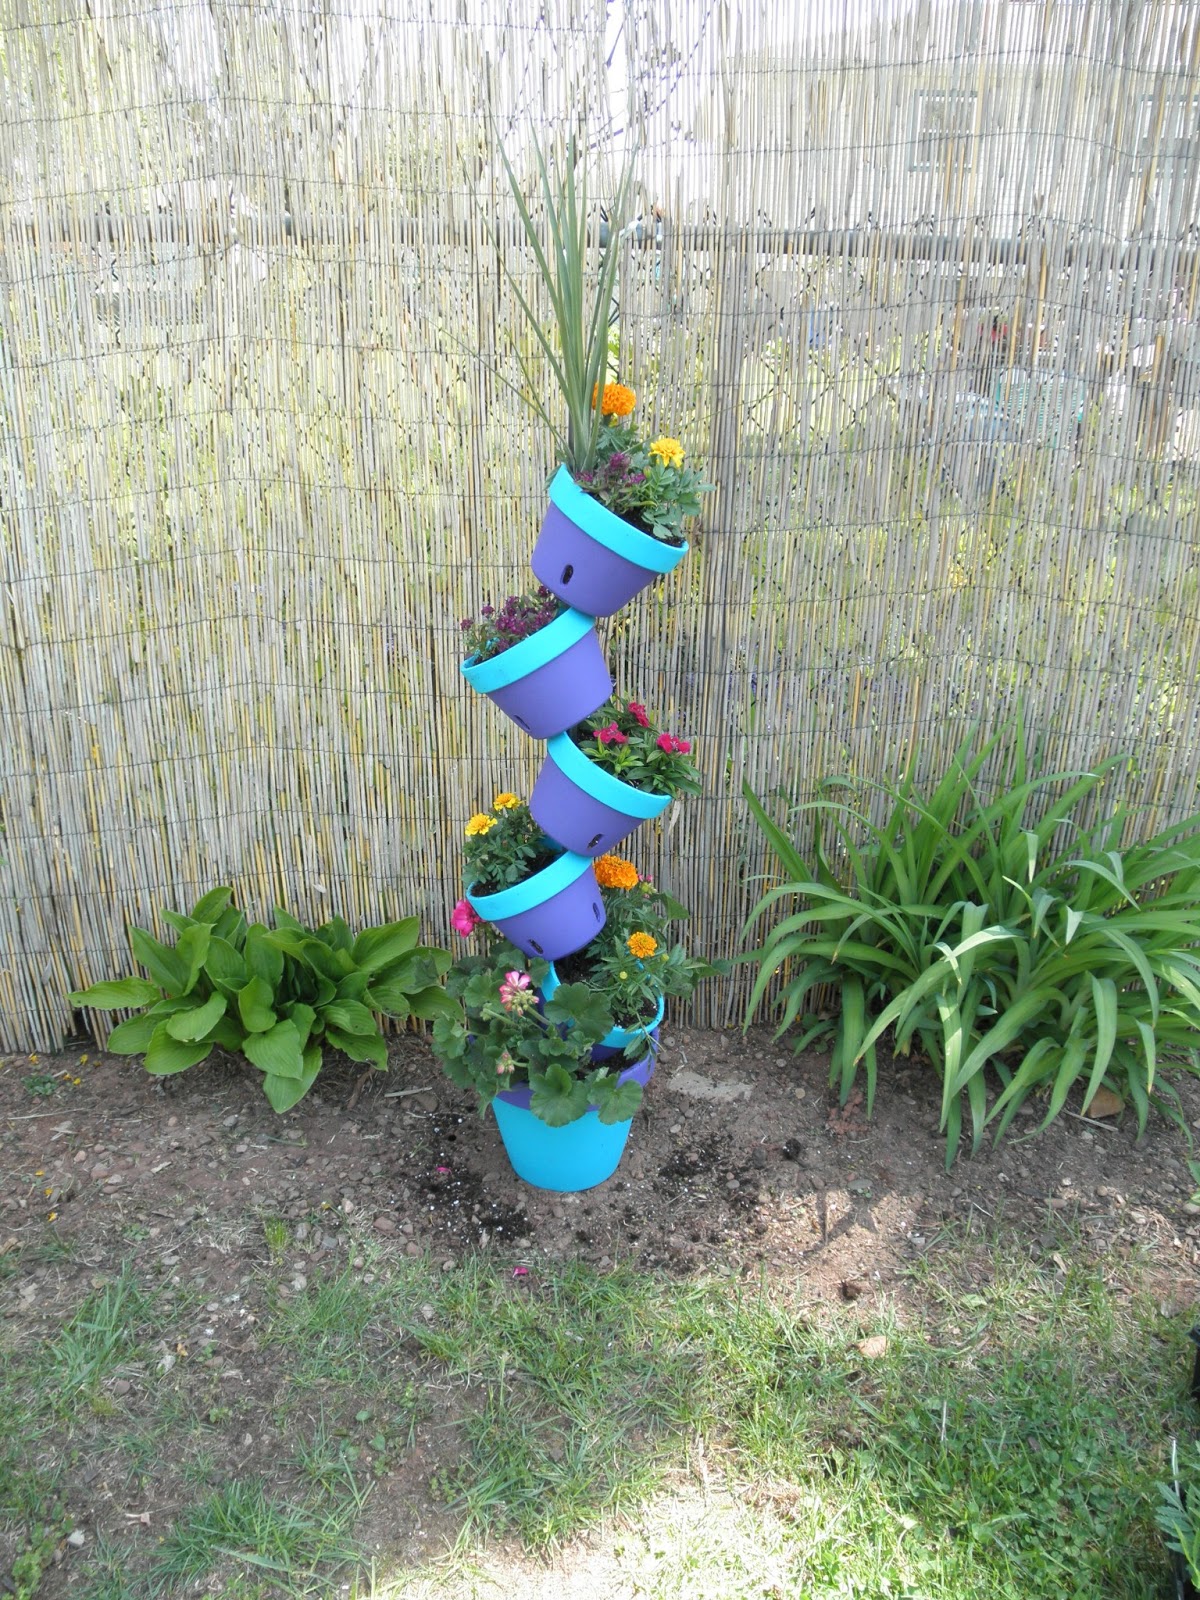 |
| Here it is all done, pots & plants. |
 |
| See how that spike plant hides the top of the metal rod, ah, I was using my noggin. |
 |
| And tada, the finished project, all pretty with happy plants and a fresh bed of mulch. I completed this project a while ago since I knew we were expecting the giant cicada invasion of 2013. Don't have them in your neighborhood? Check out my video so you can enjoy these amazing and disgusting creatures of nature. |
Here's the full hop line-up:
Deborah ~ http://www.scrappingmamma.net/
Nancy ~ **you are here**
Inga ~ http://mommahobbit.blogspot.ca/ **your next stop**
Robin ~ http://create-a-latte.blogspot.com/
Lissa ~ http://www.somanycrafts.com/
Lori ~ http://www.scrappinmystressaway.blogspot.com/
Jessie ~ http://edoggsugarlipsandprincessbuttercup.blogspot.com/
Miranda ~ http://www.nanasscrapspot.com/
I hope we've inspired you to try your hand at something fun and creative for yourself!! You can find me on Pinterest here and Facebook here. Head on over to Inga for some more awesomeness. Thanks for hopping with us today!

oh wow that is super cute!
ReplyDeleteWow! That looks great and so easy to make!! Thanks for the tutorial!!
ReplyDeleteGlad to be in this hop with you!
You did a great job on this - I hope I get moved in time to actually do one and enjoy it! If not - it's on my list for next summer for sure! Love it!
ReplyDeleteThat is really cool!! I love the colors you used and it was a great idea to cover the left over metal with the spike plant. Thanks for sharing.
ReplyDeleteracincrafts at aim dot com
Nancy, this turned out really cute! I have seen this on Pinterest and thought it was very whimsical! I would try it if I didn't live in an apartment!
ReplyDeleteKatie
http://ktscreativeinsights.blogspot.com
creationsbykatie@hotmail.com
Very, very cute Nancy! Love it... makes a great Herb garden too :)
ReplyDeleteVery cute idea.
ReplyDeleteThat is such a cute idea. I have never seen one of those. you did a great job.
ReplyDeleteNancy, I love, love, love this idea! I've seen it around Pinterst and have been wanting to try it!
ReplyDelete